


 Rotations
- Note: Some sites require translation or security change.
 Andrasta's World
- Around the Sims
- Atelier Quebec
- Awesome Expression
- Bast Dawn
- BNJxLVR
- Boudoir Blanc
- Bunny Wuffles
- Corry's Factory
- Damone Damore
- Dramatica's
- Eph's Den
- Ferndale Sims
- Ingrid's Studio
- Jove's Sims
- Lead Pipe
- Lilting Sims
- Madoria's World
- Magnolia Sims
- Marina's Sims
- Mirrored Sims
- Moni's Sims
- Nyx
- Odd Sim
- Oleana's Clutter Factory
- Ophelia's
- Parsimonious
- Persimmon Groves
- Poetica Place
- Russian Vacation Sims
- Shiny Things
- Sim Logical
- Simbeule's Curiosities
- Sims A Little
- The Sims Emporium
- Sims of the world
- Siren Shadow
- Somesimthings
- Space Cadet's Sims
- SS of Woobsha
- ST Fashion
- Stray Pixles
- Watersim YMDesigns
- Yawon
- Vivacious
- Voyage Sims
- ZombieSims
- FreeSO (Defunct)

Recent Updates:


Hot Date Required

Hot Date Required
Hot Date Required

We've filled a little iridescent tubvase full to overflowing with as many yellow baby roses as it will hold. Ready for immediate delivery to your Sims' front door, all you have to do is place the order.
Hot Date Required

Hot Date Required

Hot Date Required


Hot Date Required

Hot Date Required
Hot Date Required
The Sims Required
The Sims Required
The Sims Required


NEWS
Simbabes' Mood Indigo
5 Long-Winded Paragraphs
- Updated a few pages in the Buy > Items section
- Knowledge contains a few modern bookcases
- Pets contains pet beds, inluding ones from various sets, as well as object pets & static animals. Unleashed pets are still located in the skins section and were also recently updated.
- Wardobe section has mirrors, coat hangers, dressers and armoires. More of theses items can be found throughout various bedroom sets, themes & other rooms for mirrors.
- Did I mention I updated the Periods skins in the Themes section? Well, Yes I did. I think everything is up, though a few may still need new screenshots. Any volunteers?
- Roomsets should be complete. Let me know if I'm missing anything you can't find.
- You can reach me in the Discord or Facebook group (If you can find it. mwhahahaha). I don't post a lot in the Facebook group. It's really for announcements. If you really want to be notified about updates, the Discord is the best place to keep up with the my updates. I even forget to type in here sometimes.
- I'm sure I have forgotten to mention something, have fun running around the site catching new content, like you're playing Pokémon Go!
ID Fixes
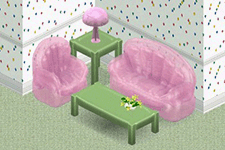
Lime Plastic Coffee Table
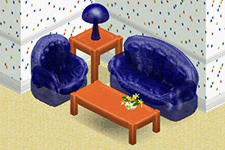
Melon Plastic Coffee Table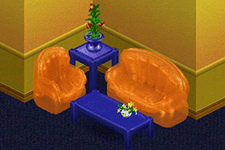
Orange Bubble Cuddle Loveseat
New IDs:
Hippie Theme Bubble Sets
Updated Cool Sites
Why Old Sims 1 Sites Seem Unsafe
— But Usually Aren’t
-
Old Websites Often Lack HTTPS (Secure URLs):
Many Sims 1 fan sites were built in the early 2000s, before HTTPS (the little lock in the browser bar) was standard. Modern browsers now warn users when a site doesn’t use HTTPS, saying it’s "not secure."- What it means: This doesn’t mean the site has a virus — just that it doesn’t encrypt your connection. It’s more of a privacy warning than a virus warning.
- Note: SimFreaks still has some spots that may flag "insecure". I'm still currently updating the site and it may take a while to get them all. I do try to change them as I find them, but that reqires more than simply changing a page name, as I also tend to consolidate, update navigation, and convert to a hybrid .php format as a quick solution.
-
Outdated Designs Trigger Suspicion:
Old HTML, broken images, and clunky layouts can make a site feel shady to someone who’s only used modern platforms.- What it means: Just because a site looks outdated doesn’t mean its files are harmful. Many of these were hand-built by hobbyists and just haven’t been updated in 15+ years.
-
Browser and Antivirus Over-Caution:
Modern antivirus tools may flag old .zip or .exe files simply because they are unfamiliar or unsigned. This happens even to completely clean files.- What it means: False positives are common, especially for custom content installers or utilities made by fans.
-
Most Sims 1 Downloads Are Just Images and Package Files:
The majority of Sims 1 downloads are.iff,.far,.bmp,.png, or.zipfiles containing graphics, meshes, or objects. These aren’t executable viruses.- What it means: If you’re not downloading executable programs, you’re almost certainly not risking infection.
-
A Real Virus is Rare and Usually Easy to Spot:
Legit Sims 1 fansites don’t intentionally distribute malware. If a site is still maintained by a known creator or part of the old community, it’s usually trustworthy.- What to do: Stick with known sites, check if the creator is still active, and always scan zips if you're unsure — but don’t panic over a simple browser warning.
CUO1FA Skins
Heads & Skins Updated
Deg Deg Everyone!
Installation Instructions
Installation Instructions Page
How Our Heads Work
Ultra Heads
Real Heads
Disclaimer
Fabricio's Heads
Dov Sherman's Low-Poly Heads
Daniel's Heads
Simpose Posing Volunteers
I have quite a lot of news here to share with two days worth of updates. Today's updates are about fixes and some critical updates. The updates dated for yesteray are new rereleases.
CRITICAL UPDATES
& Update your archivesThe Valentine's 2001 Pack (In list Below)
Not sure how I could have possibly missed this. These skins must be updated to work in your game. They had been saved as compressed, which is a common problem I had with Cherie's (sfC) skins. I am trying to go through and updated all of them so this doesn't happen anymore. Unfortunately there are other cases where sfC exists. Cherie was the first sfC, but Lorceel used sfCLK, Captain sfCPT, Mystery Theme sfClue, Colleen Morgan sfCM, Church Theme sfChurch, and more So simply searching and fixing isn't really easy. I went through 1906 zip files beginning with sfC and systemmatically updated all Cherie files (one hopes). I can't guarantee I got them all, but I think I did.
Please if you run into this display error on any skins on SimFreaks, contact me immediately.
All updates include any versions available.
TBR (To Be Released) means the pack is not officially released, but you can download it here today. I just don't have screenshots. I do this so people can update their archives.
In cases where multiple files have been updated, I have linked the packs if those packs have been created. Otherwise the downloads are individual.
- Female
- Valentine's 2001 Pack

- Sexy Shoulders Pack (TBR) (Glimmer Skin)
- Skin Set 1 (Hotties Section)
- Skin Set 2 (Hotties Section)
- Summer Tops Pack (TBR)(Tube Top)
- Sunshine Daisies Pack (TBR) (Chiffon Shirt)
- Girls
- Pool Party Pack

- Kiddies Pack
- Denim Daze Pack
- Summer Flirts Pack
- Plum Plaid (Dress Up Pack)
- Pink Tie-Dyed Tee (Summer Activities Pack)
- Boys
- Recess Pack
- Sporting Pack
- Paintbox (After School Pack) — File Corrupted
- sfCBlueSnowflakeSweaterSV — Fixed Winter Wear Version & to Unisex.
- Critical Update
In the CMX make a copy and replace the same letters, open the file in a text editor and change the first line that lists the file name (don't change xskin line. Only first one)
- Men
- Ocean Palm Aloha Shirt (Partial Sim Stud)
- Hibiscus Aloha Shirt HD (Partial Sim Stud)
- Red Tee 'n' Cargo Pant (Novel Tees Pack)
- Island Vacation Pack (TBR)
Newly Re-Posted
The following sets have either been added or updated:
Female Fit Formals Page Completed Moved to Own Page.
- New Packs (Rereleased)
- Almost Formal
- Dinner Out
- Evening Soiree
- Infatuation
- Midnight Madness
- Moonlight Serenade
- Natural Tones
- Party Frocks
- Polka Dots
- Ravishing Beauties
- Spring Fling
- Veronica's Closet
- Fixes
- Flirty Formals (Added TS Everyday Wear)
- New Year Pack (Nested Folders Removed)
- Compressed Skins Fixed (Caused Display Issue)
- Glamorous Pack (Spangled Skin )
Per Usual, Please let me know if you find any errors on this page. Thanks (edited)
Updates
Fixed Male Skin Navigation on Sidebar.
Added a bunch of skins & images. Hard to say what was added as some were merely image updates and fixed some coding errors that may have prevented download of some items before.
The following sets are now available on this page. 25 More to go. Posing & screenshots take a lot of time. If anyone wants to volunteer, let me know :D- Added many things on the Female Fit Everyday.
- Clubbing
- Cool Casual
- Cool Comfort
- Country Life
- Down to Business (Added Golden Outfit)
- Friendship
- Gunne Sax (Added Country Gunne Sax to Set)
- Xandher's Hot Mamas
- Jeans
- Mid Drifts (Fixed)
- Mono Classic
- M Size Skins
- Night Life
- Pants
- Party Pants
- Picadoozy Square
- Promenade Deck
- The Underground
- Tongue & Cheek
Donations
I've posted a donations link as we have been keeping these sites alive for quite some time on our own. Our current situation is a struggle, so just asking for help to keep us alive and hosting.
Navigation Tip
Please use the side navigation to get around the buy mode area. That will be the most up-to-date, as the index pages may not currently reflect all the updates
Last few days of updates below.
I don't have time to post every day about what i'm updating. Currently, I'm working on the objects section. As this is happening, you may find some missing links, missing, images or things you're missing from your downloads directory!
Updated the Thanksgiving Foods, currently located in Buy > Items > Foods
In my search for my Birds of Paradise beautiful recolors, I was able to recover a lot of things I have tweaked, update and a few that I've made. Not sure exactly what is there yet, but I hope to discover soon! Of these items, the Thanksgiving food, I believe I actually redid many of the sprites, like Jerry's corn, which was always a little green.
Tapestries
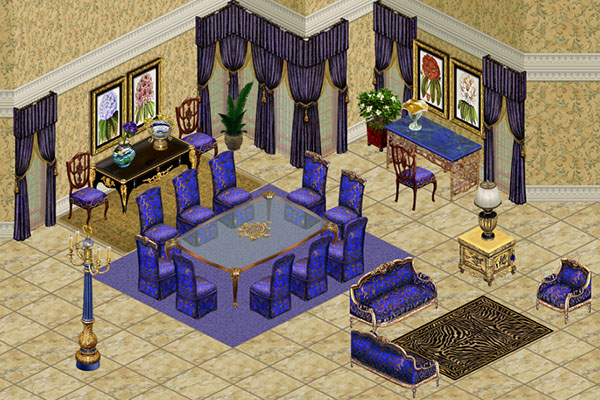
Tapestries now available with seventeen (17) collections added to our wall decor section. The buymode side navigation has been updated to include this new section.
Wall Decor Pictures, Posters and Paintings.
Added a few collections that were accidentally left off, the index.
- Inverted: Just the old maxis pictures with the image colors inverted. A couple turned out pretty cool.
- Eclectic Array: Odds and Ends that didn't really fit in a particular collection.
- Spring Ladies: Single-tiled twin set of paintings in gold and blush red.
- First Kiss: Heavenly cherub
- Jazzman: Red & blue paintingwith a bold blue frame.
- Study Board & Cork: Cork boards with notes.
- Poem: A sunset with blond sim with words too small to read.
- Invisible Pic: Used to raise room score without having to have a painting. Must remove wall to delete.
- Earthly Expressions: Fixed Chef's Bridgade Image and Link. If you downloaded the collection, you should already have it.
Painting Collections
Navigation Overhaul
Homepage, Build, Buy, Skins & Themes navigations have been updated. I may continue to make some changes to make navigation a little easier. You may still come across some errors. If you find any in the navigation, please let me know on our Discord.
Many Updates
I've been doing a substantial amount of updates. I will do my best to cover everything that has been completed to this point. This has been big project covering several different areas. So many adds that I'm not sure I have documented them all, and yet there is still so much missing.
I have made so many updates to the female body skins section now. New screenshots, new groupings, same stuff! All items have been added to the end of their respective pages.
The Female Fit pages has been fixed with the current available content. In addition, I have added the following collections the Female Bodies Pages
- Female Skn: Slim Sims are all consolidated to one page.
- Punk Shirt White Pants - Callisto
- Charity Event - Collection by Loraceel
- Slim Swimwear - by Callisto & Veronica
- Slinky Sims - Silky lingerie by Loraceel
- Playful Nights - Pajama Shorts Sets by Loraceel
- Female Fit Everyday:
- *NEW* - Girls' Day Out - By Ahn & Cherie.
The Babydoll Backless now includes all skin tones, but I varied the color. This has always been one of my favorites by Ahn, but it was an earlier skin before we started doing all skin tones, so I took her original skin and changed the color of the top. Super cute! - Amoebaderci - Dresses with various patterns in various circular designs by Squeegee
- Denim Skirts - by Ahn, Cheri, Callisto & Jennifer Edwards
- Down to Business - Skirts Sets by Ahn & Veronica
- Fabergé Florals - Dresses by Squeegee
- Flirty Capris - Pants & Tanks by Ahn & Cherie
- Floral Fruitcake - Dresses by Squeegee
- Get In Shape - Exercise Outfits by Ahn, Daniel & Veronica
- Go-go Gadget - Psychadelic Go-go Boots outfits by Squeegee
- Goth Gals & Gothic Style - Black, white & Red outfits by Fabricio.
- Gunne Sax - Long dresses in a variety of style & a cute short blue dress by Aubrey Weese
- Gunne Sax in Spring - Modest dresses in Spring colors & one blouse with pencil skirt by Aubrey Weese.
- Hello Hawaii - A small variety of Hawaiian inspired outfits by Ahn, Cherie & Callisto
- Hot Pants- Blue & red pleated shorts sets with a silky turtle necked crop top by Veronica. One of my absolute favorites!
- Jeans - Differently styled jeans with various blouses by Cherie
- Kaleidoscope - Colorful patterned dresses by Squeegee.
- Keepin' It Cazh - Various pants outfits by Jennifer Edwards & Outi
- Matchy Matchy - Single-colored dresses by Squeegee.
- Mid-Drifts - Cool jean and crop top outfits by Callisto & Jennifer Edwards
- Mumbo Jumbo - Orange, black & yellow dresses with a special African inspired Kente dress with matching heads with bandanas in all skin tones by Squeegee
- Nosey Neighbors - Sophisticated dresses with gold, green, red, and black by Squeegee
- Pop Summer Nights - Clubbin' outfits. A couple of colorful punk outfits & fun mini skirts by Xandher & Ahn
- Zebra - Pants, Dress & Mini Skirt outfits by Jennifer Edwards
- Female Fit Expansion Pack
- Blews - A full set of outfits in bright blue & white designed to compliment each other for each outfit type by Seammer
- Objects
- Bathrooms now available on one page.
- Bedrooms section is now available. I have a **missing Chinese Bed** posted also, if anyone has this, please send it to me. The picture is shown on the bedrooms page is without the pillows. Thank you.
- Skins > Props
- Props links fixed.
- Build > Themed > Christmas
- Eyptian Walls - Now available again.
- Asian Walls - Downloads page repaired.
- *NEW* Home for the Holidays Walls and Floors. I stumbled across some images I had, which I did find screenshots for, but I couldn't find the files. I was not even certain as to whether they were called Home for the Holidays or simply sfXmasWallpaper##. I found no evidence of these files and I know I haven't had them in my game for a very long time, so I've renamed them. If someone does happen to have the originals, please contact me through our discord.
- Older walls, Santa Pack, Sleigh Pack, Gingerbread Interior and Exterior Walls. Pick up the Candy Roofs in the Build > Roofs section for full effects.
- Amonsetira's Snow Floors Pack. This pack was designed to go with his snow rugs in the Christmas Theme and should be combined with them to get the full effects.
Other roomsets are still a mess. Please ignore.
A reminder that we have a lot of the Simskins files up for download in their own section. I have put a link under guest sites in the main page. I tried to design this in a way that paid tribute to the original Simskins site, but I freakified it.
I do not know if I will ever find time to post their poses, as I don't have screenshots of them. I may just throw up a list at some point.
Please visit our SimFreaks Discord if you find anything linked incorrectly or missing from our new pages or if are looking for anything specific that may be missing. We will do our best to help you all while the site is still in repair. The site is extremely huge and I'm trying to find time to work on it when I am not working on my Work work. I need my downtime too!
Pirate Theme Fixed
The house page needs looking at but everything else should be there. Let me know if you find any errors. This was a sort of quickly done section and doesn't have all the bells and whistles.
Slice City 2.0 Released
Introducing Slice City 2.0—a whole new gameplay experience. An extraordinary amount of new files are included—76 new files, making more than 120 plus files! Every preexisting file has been updated or replaced, including all previous add-ons. Two core control objects, a modern City Plaza and a Power Plant, work in conjunction with each other. Watch as citizens fight crime, put out fires, or interact with your Sims for the first time. Various vehicles, including little horses, roam the lot for various purposes. Numerous new features and disasters (e.g. Bugzilla) are included, along with surprises.
As in Slice City Original, citizens continue to live, play, work, and generate profit for your Sims. They utilize businesses, homes, and venues, which cost Sims § to maintain. Beyond the city environment, Sims can now develop rural farmlands, industrial zones, or suburban areas. The expanded Seaport and Air & Spaceport bring imports, exports, and new citizens in a variety of vessels. Additionally, the Space Rocket attracts alien colonists. Also unique files such as Tiny City allow Slice City citizens to play their own mini-city, benefiting Sims as well.
Many more details are included with the download, and in-game via convenient "Info" buttons on every object. Or, simply download it and dive in. As before, all you need to start is the Power Plant (Buy Mode > Decorative §100). Like ZombieSims, this custom content expansion pack contains a vast amount of interactive material.
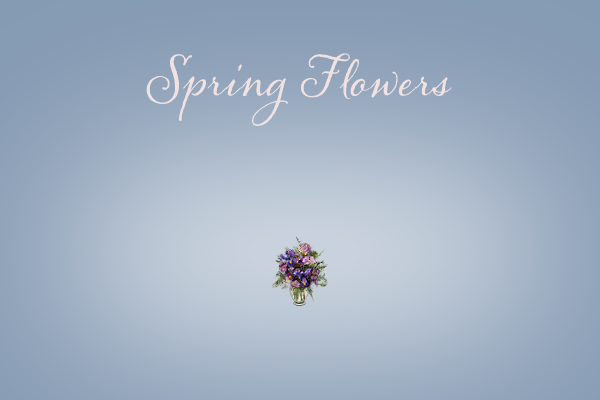
Wall Flags & Flower Vases
Static Wall Flags added to Wall Decor and currently are grouped with paintings.
Flower Vases added. I haven't really begun on redoing the plant section yet, but found I had this which I was moving from another section, so I went ahead and put it up on the site.
Miscellaneous Appliances Added
Added Miscellaneous Appliances to Appliances section. Some of these are old recolors and some of my first objects, so apologies to those like me that think they are ugly, but the radiator is cool! or warm, the stove and food horn are decent. Please read notes on objects. Cheers.
Paintings Section Complete
Wall Art - Paintings now complete with 191 paintings. This should have most of the sites paintings, including ones from various sets. Only a few random paintings missing which will be added at a later date as time allows. These all should be updated and catagorized now.
Curtains Mostly Complete
Curtains Page is now updated. This includes most of the curtains. I hope to add a few others from the mystery theme as time allows.
>Magic Cookie Database
Fixed and updated. Please do not move or reorder. Use the "Find" feature if you are looking for something specific and please doublecheck your cookies.
This database has been running since Fall of 2001. Please if you haven't added your cookie here, do so and spread the word. Cheers
Offsite: Patch for Zombie Sims
Simslice released a patch for ZombieSims A reminder that all Simslice files are available on ZombieSims.com with lifetime subscription. This is a temporary solution which we had hoped to resolve over this holiday, but we have hit a larger issue at the moment. So keep a backup.
We are currently in the process of moving SimFreaks 1 to a new server. SimFreaks 2 is going to be in limbo for an indefinite amount of time until I can figure out what I can do to save it.
Patrick J Barrett III, who did all the original sims, expansion packs object code, has been hosting the sites on his servers for the past 12 years or so. Unfortunately, he has suffered a stroke and I am not able to access our Sims 2 database without his authentication, which is on the East coast vs West Coast. I do have the files and an outdated version of the site on an old hard drive. as it had been updated recently, just not all the other important stuff. I recently addressed this problem with him and time was not on our side.
I am unsure what his condition is at this time, as I only receive a very brief update. In the meantime, I want to do what I can to keep the site up, so SimFreaks should be fully uploaded within the next few days. Expect bad links, missing images for a few days, then after I'm finished, expect the same old mess , because I have not miraculously finished the never-ending redesign.
All of Patrick's friends and former colleagues IRL* and IVL* are wishing him the best during his rehabilitation and sending prayers and positive vibes.
We wish you all a Happy New Year, SimFreak & SimSlice & The Zombies
Winter Wear
All Winterwear is now available. I have added skin tones for any of the old skins that were only available in one color. Cherie's skins were update to be index properly for the game. All new screenshots to showcase the skins in their best light. Please contact us through our discord if you find any problems on this page. Happy Simming!
Male Skins
Male Pants updated with new images. Bang Bang Guy's body file by Ahn in the Summer Shorts pack is now available in all skin tones All of Cherie's skins have been resaved as they were showing up white. Let me know if you find any download issues in this section.
FAA Girl
By request, I have created the FAA Girl & BH09fachd_sfhcFAA body mesh for this set. Please let me know if you have any mesh number clashes. This mesh added long slightly over-sized sleeves and heels to the B009fcchd
Revised Christmas Trees
& New Christmas Tree with Train
These trees have all been updated. Spites were fixed, they hav been recatagorized in Decor > Plants and all are priced the same, to make them a bit easier to find.
These trees have all been updated. Spites were fixed, they hav been recatagorized in Decor > Plants and all are priced the same, to make them a bit easier to find.
Christmas Tree Train by Mary was never released before. The trees sprites were previously jumbled and took many hours of work to sort out. Once reassembled, I adjusted the animation speed to make the train run as smoothly has possible with the limited animations.
Revised Christmas Skins
The Grinch, Snowmen, and Mall Santa have all been updated for expansion packs and have NEW Winterwear and High Fashion outfits
Almost Merry Christmas Again!
The Mall Santa's and Snowmen have been updated for All Expansion packs. I have created High Fashion and Winterwear outfits for the Mall Santas. For the Snowmen, I have turned the Nude Skins to Winterwear, added a High Fashion Outfit for the Snowman and Snowzet (adults) that I created to complete the set. The nudes for the snowmen will be white, but unfortunately with Unleashed, the ability to create the body shape was broken.
I still have to work on getting the Christmas Trees up, but all other Christmas objects are available in the Christmas Section. Objects & Skins The Themes Side Menu has direct links as well.
I've been working on the Christmas objects section and trying like crazy to finished it but still have a couple of sets left. I have updated quite a few file, replaced and fixed issues like bleedy objects, yellow halos and well any of mine I thought were just plain ugly. View the new Christmas Objects Section here Please download Christmas Objects from this page, as the older section may give you older versions. Thanks.
North Pole Sign
IMPORTANT: You may wish to remove sfhcNorthPole1.iff and sfhcNorthPole2.iff as this is a better version
This file replaces my old north pole sign, which was originally split into two pieces that had to be stuck together. I had always wanted a better base and had little experience with 3D at the time. The model was not created by myself. The over-saturated color caused bleeding in images and just didn't really look very good. Not only did I fix the image, but I changed it to an arched fence base, so you can surround your Christmas Tree lots with it if you wish. I wanted a functional arch, and this was the best option. Unfortunately, because the fence base is weird, I had to put the wording on both sides.
![]() This object is hacked. I took the fence base and was able to remove a ton of drawgroups to decrease file size and ease of creation. Why Maxis created this in the most difficult way, when I found way to break the images down into 2 drawgroups. You won't notice a difference. If you would like to use this to create other signs, I ask that you don't change the color, but make something original with it. You may resurface, but not recolor. Please give the site and me credit. Thanks. Heather Castillo
This object is hacked. I took the fence base and was able to remove a ton of drawgroups to decrease file size and ease of creation. Why Maxis created this in the most difficult way, when I found way to break the images down into 2 drawgroups. You won't notice a difference. If you would like to use this to create other signs, I ask that you don't change the color, but make something original with it. You may resurface, but not recolor. Please give the site and me credit. Thanks. Heather Castillo
Cornucopias
IMPORTANT: Please remove sfasrCornucopia.iff as it is corrupted.
I created this decorative cornucopia to replace our missing/corrupted file. This file will be located in our Thanksgiving Theme section, once I get it redesigned.
Currently, I am working on our Christmas and Buy Mode Objects sections. I have installed all of the objects and check for ID clashes. The new files will be available as each section is completed. I have also renamed some files to better fit our naming structure. Some objects have even been updated because of graphic flaws or I was just too embarrassed to put up my old ugly objects. :D.
Shock Roofs

I created the dark shock roofs to go with some various Tudor assets from other sites, and of course in true SimFreaks fashion, they come in a variety of colors, including one dark snowy one. These shock roofs really tuft well in the game. You can view these in working order in our windows section in build mode.
Small Siding
This lost siding was found in in a folder, and I do not recollect ever releasing the items, so I ran them through Homecrafter. More lost items may appear in the walls and floors section.
Bathroom Bowl Sinks
One object, 20 Colors! Thanks to Woobsha for making the sink base for this object. I added onto it by adding 20 different colors! Just place, click in play mode and choose your color.
Build Mode Objects Updated Again
The build mode object section has been updated again. After a computer crash, some files went missing due to me not realizing they were corrupted and didn't transfer, and then accidentally deleting them. Luckily I have 4 backups of the old site and have been able to recover most everything. I've even found some items that went missing or never got released! Those will be coming soon.
Geisha's by Heather.
Please Read.
The CU01fa_Geisha1 through 5 are now available.
CU01fa_Geisha has been replaced with CU01fa_Geisha1. I found some issues with the original Geisha Suki head mesh, as the flowers were displaced. I did not replace the file, rather made a new head mesh as some might like the dangling effect that occurred with the old mesh. All other head meshes are new.
Keep in mind these are all medium tone. You may wish to download a CU01 dark and Light Ultra Head or Skin so you won't have blank head meshes in game. You can do so here.
Kimono's by Ahn
Five beautiful kimonos have been retrived fromm the files section and are now available again.
Generations's by Ahn
Six heads with big bun hair meshes have also been found! Adults and Elder females.
Latest Updates
Face of the Pharoah
Although the object was given to me many years ago, I was never happy with the original color, as it looked like mustard yellow. While working on the Egyptian section, I stumbled across it. I took this object created by Amonsetira and made some adjustments to the color. I hope you find them useful.
Latest Updates
Greetings from Heather.
SimFreaks is currently being revamped. Please be patient while I am working on this, because I'm going to make an even bigger mess. This project began as me adjusting Jerome's meshes and then sort of flipped over into SimFreaks and Jerome's site is sort of working, but I went off on a tangent! I had to skin a few meshes, as he had used skins from other artists over the years and I have no idea where to find them. So I started skinning his meshes. After that was done, I thought I will use one of the skins to give away with his meshes and then pop the others up on SimFreaks. Well....Over the last decade, I've been very busy working on various other projects, so the site grew old and dusty. I tried calling the NPC maid, but all she did was clean the shower all day. While the site got dusty, my coding skills got rusty and out of date too, so I setup the SimBabes section which was almost what I wanted, but isn't quite right.

While digging around, SimBabes' Classics, I found Donna hiding out in the file system. She was sneaking around in the backend, hiding without any images. I dug deep into my old hard drive to no avail, so I had to start whipping out tools, and SimBabe got excited. Then Donna posed with all her glitz and glamour making a spectacular debut with all the elegance of a Classic SimBabe.